Ho Ho Ho! Celebrate the Season with these Festive Activities for Preschool!

Hard to believe it is December 1st tomorrow!  Yes, our Christmas tree has been trimmed, we have lights on the outside of our house, and I've even started doing some Christmas shopping.  But that's largely because of my youngest daughter's "influence."  Her exuberance for the holidays is hard to overrule!   

One of my holiday traditions at preschool is to do a puppet show for the kids based on "The Night Before Christmas" by Clement C. Moore.

The children love puppet shows, no matter how basic, and so I try to perform one at least every couple of months.  
   
Even though I do this Christmas puppet show every year, I have never had a set of materials organized.  I usually just collect all the items I need for props the night before.  I "steal" my daughter's mouse from her toy box, I pull one of my Santa ornaments off the tree, etc.  Not very efficient.

So this year...I decided to create a set of puppets to keep in my Christmas resources box.  
Ah! Why didn't I do this before?  It will be so nice to just pull the set out ready to go!   

Here is what some of the characters and props look like.
  I edited The Night Before Christmas story and then typed out a script and included prompts on the side for the different actions.  When I do the puppet show, I just tape the script to the back of my "theatre" for reference. 

As for the theatre, I like to just throw a blanket or tablecloth over our rolling cart.  Lots of space for the puppets and for me!
Sometimes we also tip a table on its side like in the image below.


It just depends upon the puppet show and whether we want a flat surface to set down props or not.   

Another preschool Christmas activity I've created is the "Help Santa Fill the Stockings" game.


The children can pop an elf hat on their head and act as Santa's helpers!  
They choose from the lists provided and then they must collect all the items from the list to "fill" one of the stockings. 

Poor Santa has so much to do, it's nice to be able to lighten his load!

Now, let me ask you... what could be more fun than decorating a tree at Christmas?!  (Other than eating Christmas cookies of course!)


So I created a tree that the children can decorate and redecorate with ornaments.  Add magnets to the back of the ornaments or just use as is!

If your students find a partner, they can also turn this activity into a game.  
Players take turns using the spinner and then they add the ornament selected.
First one to use up all his decorations wins!

If you're going to start gearing up your classroom for the holiday season and you're looking for some great resources, I have included the:

  • Night Before Christmas puppet show
  • Help Santa Fill the Stockings Activity
  • Trim the Tree activity and game
as well as 5 other products including the:
  • Snowflake Shadow Match Activity
  • Rudolph Ate Lightbulbs Felt board song/story
  • Down at Santa's Shop Felt board song/story
  • Gingerbread Man Count and Clip
  • Santa Pocket Chart song
in my super fun 
Preschool Christmas Activity Pack

Pick up this unit HERE and ring in the holiday season with lots of good cheer.
HO HO HO!  
  

3 Games to Develop your Preschoolers Fine Motor Skills

I have been busy creating my Christmas Unit so I haven't been doing much posting lately.

My Christmas Unit is basically done now (I may post about that tomorrow!) so I thought I'd like to take a moment and share some classroom ideas from the past week or two. 


 don't know about you, but I am always looking for new activities that would be fun for 
center time.

 Sometimes I think I like variety and new challenges even more than the preschoolers.

Vive la difference!  (I don't know exactly what that means, but it seems to fit!)


Here is one of the activities we set out this week.  Colour sorting!

We use buttons for a variety of activities.  

This is one way of setting up a colour sort that allows the children to practice their fine motor skills at the same time.  


If you don't have a sorting tray, you can also use a muffin tin and just line the cups with round paper shapes.  

This center activity features a tray of salt and some "challenge cards." 

We started the students with the shape cards and then moved on to some trickier ABC cards.

One day we also placed this salt tray on the light table to add another element of interest.   
Incorporating the light table was a fun idea, but one that I may not repeat.  

This activity can get a little messy.  

There's always one or two little dears that create their own game and start removing the salt from the bin and sprinkling it around the table. 

We'll see how our light table works the next time I turn it on!
Here we have a fun activity that requires a thin layer of oil, droppers, and water tinted with food colouring.  

The children loved seeing the drops form in the oil and then watching the colours mix to create new colours.


Their favourite part was towards the end when there was a grayish brown puddle in the bin. 


The class was delighted.  "MUD!"  Of course it was their favourite colour of all.

Here is a picture of me and hubby out in some mud.  And "riding" a buffalo.  
Just a typical day...


Not really, but I'm including it to encourage all you hardworking parents and teachers out there to remember to take some time off for yourselves.  


I know I need reminders to do it more often myself.  Balance = sanity!


Take care of yourselves!  

Corinne

If you don't want to miss any ideas and freebies from Teach Easy Resources Blog,
 you can subscribe to receive these posts straight into your e-mail box or by RSS feed.
  Just click on the Subscribe button on the right margin of this blog.  

Thanksgiving Thoughts


Thanksgiving was back in October here in Canada, but I know it's up and coming for those of you in the U.S.   

Does your family have the corny Thanksgiving tradition of going around the table one at a time to say what you're thankful for?  Mine does.  Yes, it's corny.  Very corny!  But it does get you thinking of something beyond the plate of steaming flavours in front of you.

My new habit is to open my eyes on a daily basis to all the little things there are to be grateful for.  I call it my "Pete the Cat" attitude!  

Pete the Cat stories come with "groovy" music that the kids love, but the message of the stories is even better - "No matter what you step in, just keep on singing your song."

What a great message to send to kids, and to ourselves! 
And this is why Pete is the focus of my new unit. 


There are images to use for two different Pete the Cat stories.  Just cut out the pictures and add magnets to retell the stories on a magnet board.  Or add velcro to retell the stories on a felt board.  
 

There's a fun shoe shopping activity for center time that encourages colour matching the pairs of shoes, as well as invites dramatic play as Pete shops for the pair he likes the best.

There's another 5 additional products including a 2 person button counting game, a class big book template, a Night With Pete worksheet set, a Pete poster, and a sequencing cards for "I Love My White Shoes."  
 As Pete would say, "It's all good!"

Click here to view it in my shop


And any time I'm not in "Pete the Cat" mode and I've had one of those horrible, no good "Alexander days," I look at this quote:

I don't have to chase extraordinary moments to find happiness - it's right in front of me if I'm paying attention and practicing gratitude - Brene Brown


Yes, all the little things really do add up when I focus on them.  The other stuff - well, I'm just going to let it slide.  


Pumpkin Store

Dramatic centers based on the idea of a store are always popular.  
Who doesn't love to shop!?
And what better store to have at this time of year than a Pumpkin shop?

There's lots to do at this little stand!   


There's the buying and selling of pumpkins and plastic apples...


And of course, the weighing and comparing of the different products...  
A good shopper must be sure he is getting his money's worth!


And for the particularly tidy shopkeepers, there's the merchandising of the products.  


For example, ordering the pumpkins from largest to smallest, 
or creating an arrangement of the pumpkins on little stands.  
(For the stands, I provided pieces of the trunk of a birch bark tree.)

Fall - I Spy Sensory Bin

We like to switch the materials in our Sensory Bin every month
 to reflect either the season or the monthly theme.


This month our sensory bin contains:

Leaves (from the Dollar store)
Acorns
Pinecones
Plastic rakes
Ornamental Corn
Mini Pumpkins
Plastic scale (for comparing the weights of the different materials)

After interest in playing with these items waned, I turned the bin into an I Spy game.

It would be best if the items I had included for the game had a Fall theme. 
But since I didn't have more Fall items other than what was already in my bin, I just used what I had on hand.     


As you will see on the poster, I included some cookie cutter shapes
 and various toys from around the classroom.


I also added a bunch of extra items to the bin that were not on the I Spy sheet to make the game more challenging.


For instance, I included both a red dinosaur and a blue dinosaur so that the students would have to find not just a dinosaur, but the dinosaur that was the correct colour.  


I will change the items up next week for Halloween to include skeletons, ghosts, and other Halloween items.  


Spider Art

Fall
is a season
 with beautiful colours
 fresh crisp air
 and lots and LOTS... 
of spiders. 


I don't know why they spin so many webs in the fall.  Are there not more flies to catch in the summer?  

But there they are across every doorway, bush, and window.  Waiting for some poor unsuspecting victim.  And usually the victim seems to be me!


The only upside to having spiders and webs at every turn is that it gives you an excuse to do lots of fun spider activities in class!  It's part of the season!

Spider Art Activity #1 - Marble Painted Spider Webs


Materials: 

Black paper
White paint
Marbles
Box or plastic bin (in which to place the paper as you roll the paint covered marbles)  
Spider images
String

The kids love rolling the marbles around on the paper. 
 Even the boys who never do art come a runnin' to make this project.

Once the student is finished marble painting his web, just help him tape a piece of string to the back of his coloured spider.  Tape the other end of the string to the back of the "web" so that the spider dangles in front. 

 Easy, cute, and lots of fun!  

Spider Art Activity #2

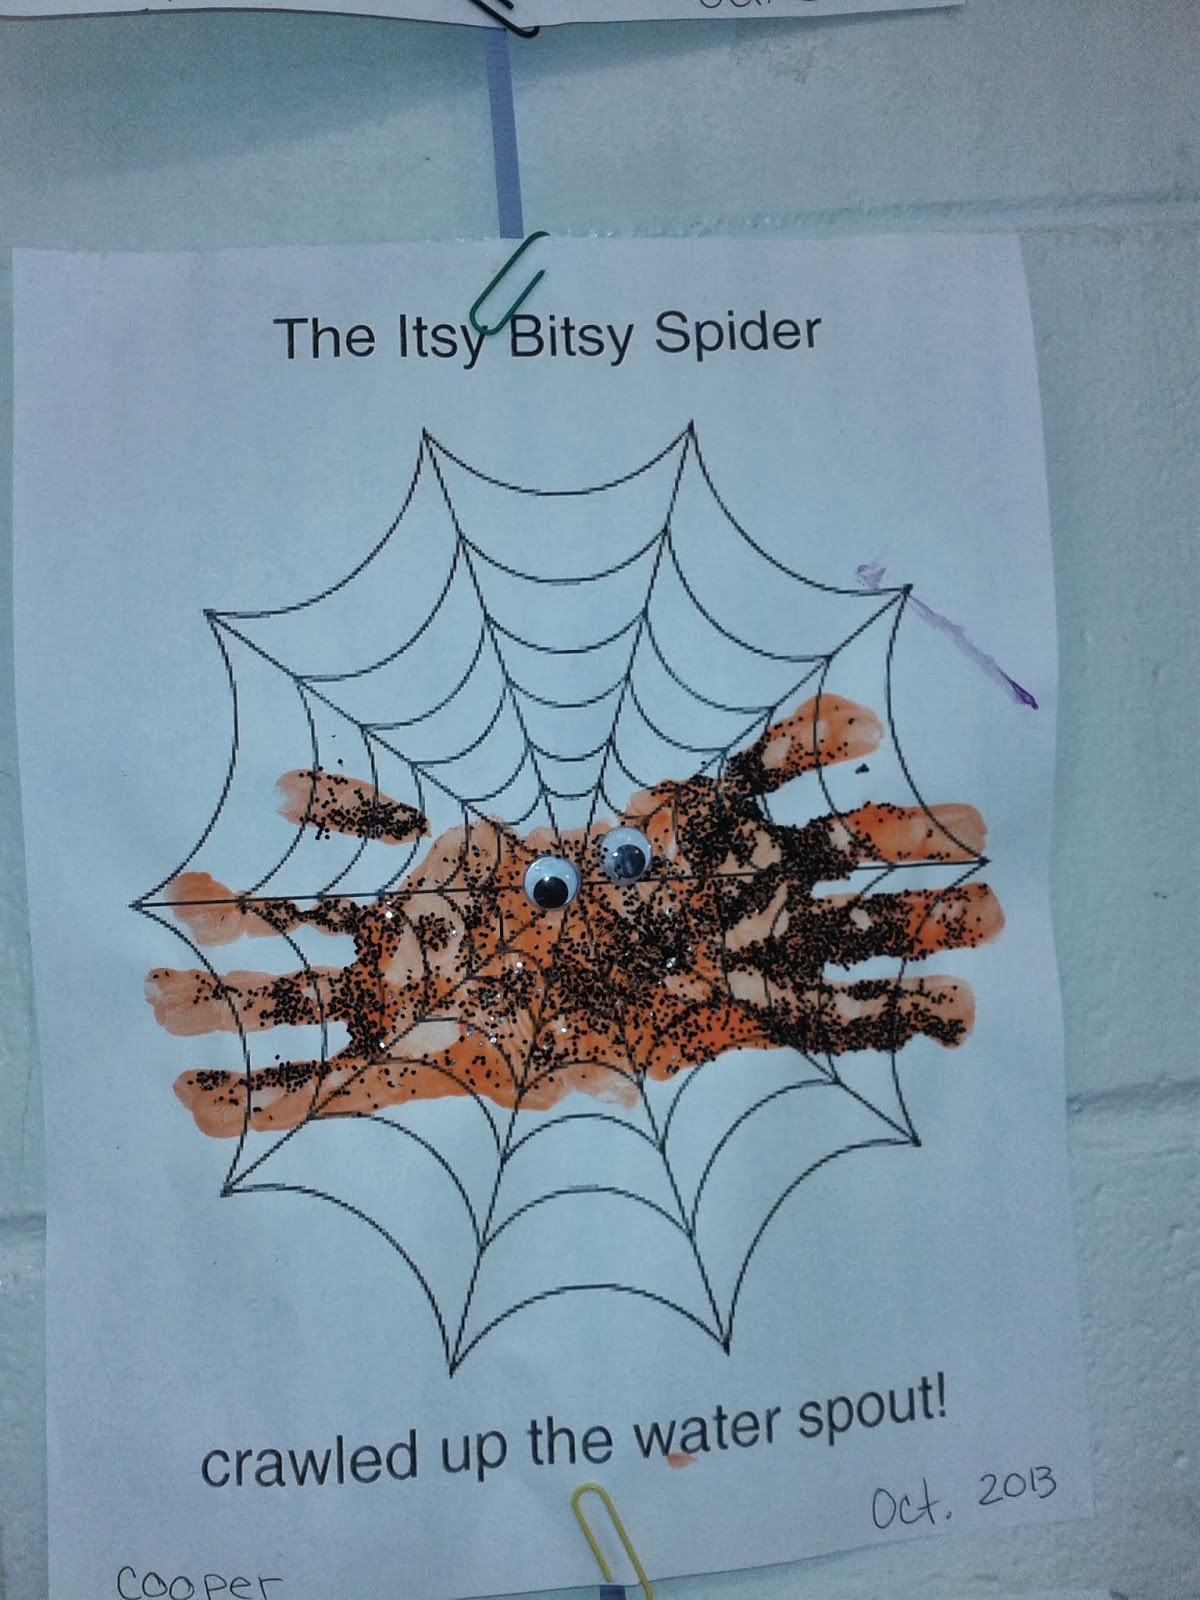
Another fun spider activity we did this week was handprint spiders.  


It's another craft requiring little teacher prep, but offering a cute finished product that the kids enjoy making.

Materials:

Spider web image
Paint (one or two colour choices)
Sparkles 
Googly eyes
Paper fly wings and bodies (or little plastic flies would be fun too)
Glue
Directions:
Add some glue to the paint if you want to have students add sparkles to their prints.  It will help the sparkles stick better.  

Paint one of the student's hands with a paintbrush and help him make a print on the spider web.  

Then paint the student's other hand and turn the paper to help him make a second print that overlaps the first. 

Students can then add googly eyes, sparkles, and a fly if desired.  

Note:  Make sure that you don't paint the student's thumbs or your spider will have too many legs!  

Here are the finished products hanging on our brick wall.  

I made a giant spider to go in the middle.  Folding the legs made him look a little more 3D!

About Me Art

Ah, a new year, a new group of wee characters with all of their endearing qualities (and a few little quirks mixed in)!

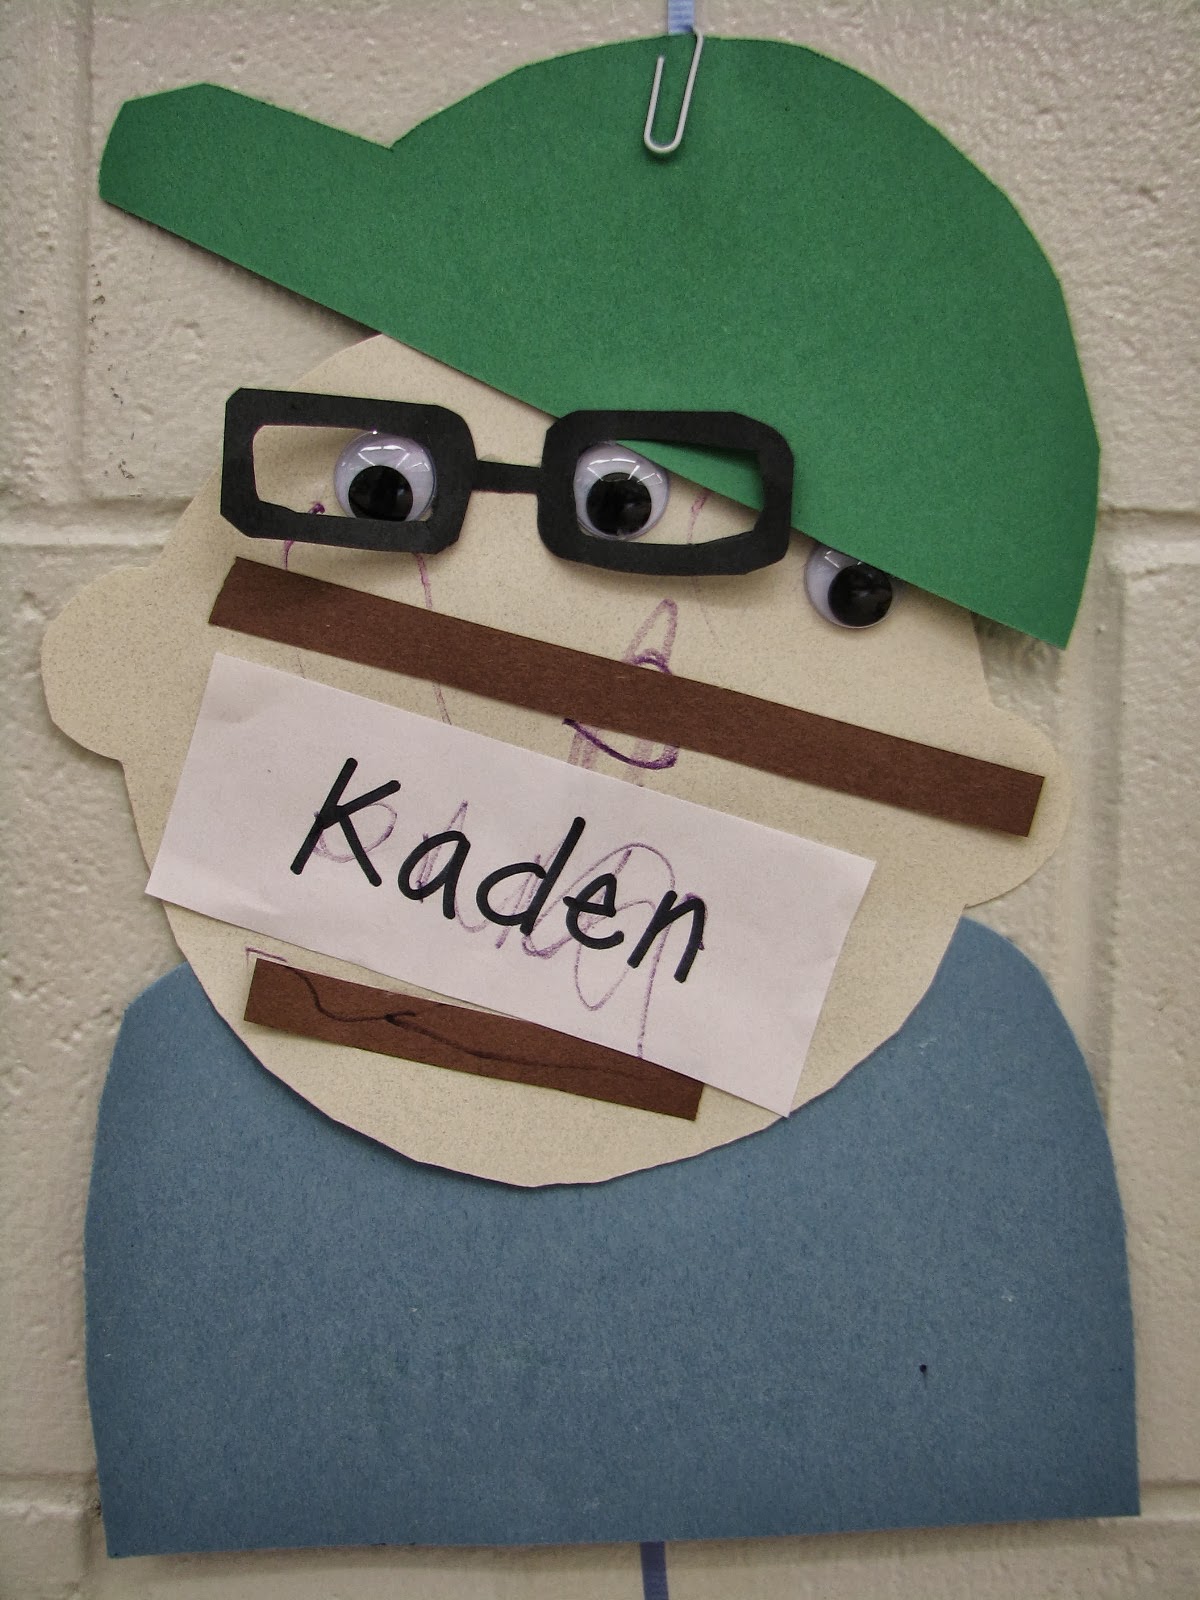
We started the year by having all of the students create an image of themselves.  

As you will see in the photos, we didn't encourage cookie cutter art or "perfection."  I always love seeing lots of variety in the finished projects.  


Once all of our little people were up on the wall the title for the display read:


 "We are all different.  There is nobody else just like ME!"  

And I think the images that the kids created prove just that!


As part of the About Me theme, our students also glued some triangle and square shapes together to create a house.  

They glued on some circle shapes for the heads of their family members (bigger circles were provided for the adults' heads) and then they drew on the faces and the bodies.   

 Below, I have a sample image for this project.

Unfortunately, the kiddos' projects (which looked far more interesting and creative than this sample) were whisked off to their homes before I could take any pictures!


Related Posts Plugin for WordPress, Blogger...